A polling station using Flask
In this series of articles we are going to build an application to run polls and maybe even surveys using Flask.
In addition to the articles, you can follow the development of the application in this repository.
Let's get started by creating a simple Flask-based application.
We create an new directory and in that directory we create a Python script with the following content:
examples/flask/poll1/poll.py
from flask import Flask, render_template
import os
app = Flask(__name__)

@app.route('/')
def root():
    return render_template('poll.html')

if __name__ == "__main__":
    app.run(debug=True)
We created a route for / that will invoke the root() function that will return the content of the poll.html template. The template itself was added in the templates/ subdirectory.
examples/flask/poll1/templates/poll.html
<!DOCTYPE html>
<html>
<head>
<title>Poll</title>
</head>
<body>
<h1>Poll</h1>
</body>
</html>
This is how the directory of the project looks like:
$ tree
.
├── poll.py
└── templates
    └── poll.html
We can now run python poll.py that will tell us
 * Running on http://127.0.0.1:5000/ (Press CTRL+C to quit)
 * Restarting with stat
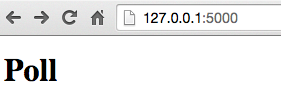
If we open the browser to the give URL, we'll see the following:

Not much, but it is working. Just like the hello world, but with a template.
$ git init
$ git add .
$ git commit -m "step 1 - hello world with a template"
Display the poll
In order to have a poll we need a question and we need a list of values to pick from. Later this should be probably placed in a configuration file, but for now let's create a dictionary in our application holding the data:
poll_data = {
   'question' : 'Which web framework do you use?',
   'fields'   : ['Flask', 'Django', 'TurboGears', 'web2py', 'pylonsproject']
}
We also change the call to render_template and pass this dictionary to it with an arbitrary key we called data.
examples/flask/poll2/poll.py
from flask import Flask, render_template
import os
app = Flask(__name__)

poll_data = {
   'question' : 'Which web framework do you use?',
   'fields'   : ['Flask', 'Django', 'TurboGears', 'web2py', 'pylonsproject']
}

@app.route('/')
def root():
    return render_template('poll.html', data=poll_data)

if __name__ == "__main__":
    app.run(debug=True)
In the template we use the expression {{ data.question }} to include the question. We use that both as the title of the whole page that will show up as the title of the browser tab, and in an h1 element to have something more visible.
Then we create a form with action="/poll"> which means we'll have to create another route for this in our application. Inside the form, we create a number of radio input elements. One for each value in the list of possible values. Radio input fields are good here as we would like to get exact one answer.
examples/flask/poll2/templates/poll.html
<!DOCTYPE html>
<html>
<head>
<title>{{ data.question }}</title>
</head>
<body>
<h1>{{ data.question }}</h1>
<form action="/poll">
  {% for e in data.fields %}
     <input type="radio" name="field" value="{{ e }}"> {{ e }}<br>
  {% endfor %}
  <input type="submit" value="Vote" />
</form>
</body>
</html>
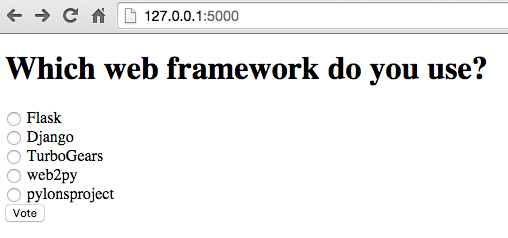
After the changes, if we visit our website we'll see the following:

If we select one of the items and click on the "Vote" button we get this response:

This just means we have not implemented the /poll route yet. Let's do that now.
$ git add .
$ git commit -m "add poll data and display it"
Accept the vote
First step is to add a function to handle the /poll route, accept the value from the field of the form using request.args.get('field'). At fist let's just return this value to the user:
@app.route('/poll')
def poll():
    vote = request.args.get('field')
    return vote
We can reload the browser and it will show our selection:

The next step is to save the vote somewhere. To be simple, we are going to use a flat file for this. At the beginning of the poll.py script we add the name of the file in a variable: filename = 'data.txt' (it is always good to have values in variables), and then we open the file to append more content (using 'a' as the parameter to the open function), write the vote to the file and close the file.
We are going to have one vote in every line. It will be easy to collect the data later.
@app.route('/poll')
def poll():
    vote = request.args.get('field')

    out = open(filename, 'a')
    out.write( vote + '\n' )
    out.close()

    return vote
At this point, if we reload the web page, it will already save our vote in the data file, but it will still just echo back the vote. Instead of that let's add a slightly nicer thank-you page:
return render_template('thankyou.html', data=poll_data)
The Flask script looks like this now:
examples/flask/poll3/poll.py
from flask import Flask, render_template, request
import os
app = Flask(__name__)

poll_data = {
   'question' : 'Which web framework do you use?',
   'fields'   : ['Flask', 'Django', 'TurboGears', 'web2py', 'pylonsproject']
}
filename = 'data.txt'

@app.route('/')
def root():
    return render_template('poll.html', data=poll_data)

@app.route('/poll')
def poll():
    vote = request.args.get('field')

    out = open(filename, 'a')
    out.write( vote + '\n' )
    out.close()

    return render_template('thankyou.html', data=poll_data)


if __name__ == "__main__":
    app.run(debug=True)
The thank-you template is this:
examples/flask/poll3/templates/thankyou.html
<!doctype html>
<html>
<head>
<title>{{ data.question }}</title>
</head>
<body>
<h1>Thank you for submitting your vote for</h1>
{{ data.question }}

</body>
</html>
$ git add poll.py templates/thankyou.html
$ git commit -m "save the vote and thank the voter"
This version of the voting station could already work, but let's add another page showing the results.
Show the results
In order to show the results we'll create another route called /results that will read the data file and display the number of votes for each one of the candidates.
This is the route:
@app.route('/results')
def show_results():
    votes = {}
    for f in poll_data['fields']:
        votes[f] = 0

    f  = open(filename, 'r')
    for line in f:
        vote = line.rstrip("\n")
        votes[vote] += 1

    return render_template('results.html', data=poll_data, votes=votes)
At first we create a dictionary called votes where we are going to collect the number of votes. Then we go over the list of expected names from the original list of fields and put an entry for each one of them with 0 votes. That will make sure each one of the fields will have a representation in the results, even if no-one voted for it.
Then we open the data file for reading, read line-by-line. Before updating the votes dictionary we need to remove the trailing newline from the line which we do using line.rstrip("\n").
Finally we pass the votes to the render_template function.
The template itself looks like this:
examples/flask/poll4/templates/results.html
<!doctype html>
<html>
<head>
<title>{{ data.question }}</title>
</head>
<body>
<h1>Results for</h1>
{{ data.question }}

<ul>
{% for e in votes %}
  <li>{{ e }} {{ votes[e] }}</li>
{% endfor %}
</ul>

</body>
</html>
and this is the full script:
examples/flask/poll4/poll.py
from flask import Flask, render_template, request
import os
app = Flask(__name__)

poll_data = {
   'question' : 'Which web framework do you use?',
   'fields'   : ['Flask', 'Django', 'TurboGears', 'web2py', 'pylonsproject']
}
filename = 'data.txt'

@app.route('/')
def root():
    return render_template('poll.html', data=poll_data)

@app.route('/poll')
def poll():
    vote = request.args.get('field')

    out = open(filename, 'a')
    out.write( vote + '\n' )
    out.close()

    return render_template('thankyou.html', data=poll_data)

@app.route('/results')
def show_results():
    votes = {}
    for f in poll_data['fields']:
        votes[f] = 0

    f  = open(filename, 'r')
    for line in f:
        vote = line.rstrip("\n")
        votes[vote] += 1

    return render_template('results.html', data=poll_data, votes=votes)


if __name__ == "__main__":
    app.run(debug=True)
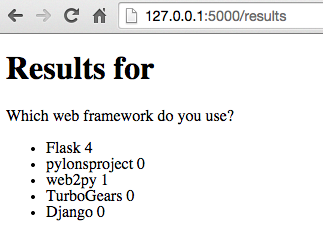
If we visit the http://127.0.0.1:5000/results url we'll see a response like this:

$ git add poll.py templates/results.html
$ git commit -m "show the results"
What next?
Comments
hello in part where we add "
@app.route('/poll')
def poll():
vote = request.args.get('field')
return vote "
the /poll pagedoesn't show me the selection I've made

The code:
from flask import Flask, render_template
import os
app = Flask(__name__)

poll_data = {
'question' : 'Which web framework do you use?',
'fields' : ['Flask', 'Django', 'TurboGears', 'web2py', 'pylonsproject']
}

@app.route('/')
def root():
return render_template('poll.html', data=poll_data)
@app.route('/poll')
def poll():
vote = request.args.get('field')
return vote

if __name__ == "__main__":
app.run(debug=True)

Published on 2015-02-17

